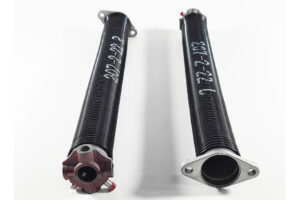
The Ultimate Guide to Torsion Spring Installation
 Are you planning to install a torsion spring for your garage door? Torsion springs are an essential component of any garage door system, as they provide the necessary force to lift and lower the door. However, Torsion Spring Installation can be a challenging task, and it’s crucial to do it correctly to ensure the safety of your family and property.
In this post, we’ll provide you with a step-by-step guide to torsion spring installation. We’ll cover everything from the tools you’ll need to the safety precautions you should take. So, let’s get started!
Step 1: Gather the Necessary Tools
Before you begin the installation process, you’ll need to gather the necessary tools. Here’s a list of the tools you’ll need:
– Torsion spring
– Winding bars
– Socket wrench
– Vice grips
– Tape measure
– Level
– Safety glasses
– Gloves
Make sure you have all the tools before you start the installation process.
Step 2: Measure the Garage Door
The first step in installing a torsion spring is to measure the garage door. You’ll need to measure the height and weight of the door to determine the size of the torsion spring you’ll need. You can find the size of the torsion spring by using an online calculator or consulting a professional.
Step 3: Remove the Old Spring
If you’re replacing an old torsion spring, you’ll need to remove it first. Use the winding bars to unwind the spring and release the tension. Once the tension is released, you can remove the spring from the torsion tube.
Step 4: Install the New Spring
Now it’s time to install the new torsion spring. Insert the spring into the torsion tube and secure it with the set screws. Use the winding bars to wind the spring and create tension. Make sure the spring is properly tensioned before you move on to the next step.
Step 5: Install the Cable Drums
Next, you’ll need to install the cable drums. The cable drums are responsible for winding the cables that lift and lower the garage door. Make sure the cable drums are properly aligned and secured before you move on to the next step.
Step 6: Install the Cables
Now it’s time to install the cables. Thread the cables through the cable drums and attach them to the bottom brackets. Make sure the cables are properly tensioned and aligned before you move on to the next step.
Step 7: Test the Door
Once you’ve installed the torsion spring, cable drums, and cables, it’s time to test the door. Open and close the door several times to make sure it’s working correctly. If you notice any issues, such as the door not opening or closing smoothly, you may need to adjust the tension of the torsion spring.
Step 8: Take Safety Precautions
Finally, it’s crucial to take safety precautions when installing a torsion spring. Wear safety glasses and gloves to protect yourself from injury. Make sure the garage door is closed and locked before you begin the installation process. If you’re not comfortable with the installation process, it’s best to consult a professional.
Torsion Spring Installation Conclusion
Installing a torsion spring can be a challenging task, but with the right tools and knowledge, you can do it yourself. Remember to take safety precautions and follow the steps outlined in this guide. If you’re not comfortable with the installation process, it’s best to consult a professional. With a properly installed torsion spring, your garage door will function smoothly and safely for years to come.


